Build your own LEEP style wide field of view head mounted display optics. Check out the instruction video and parts list below.
In the late 80′s and early 90′s wide field of view head mounted displays were all the rage; immersion was everything! The dominant HMD vendors, VPL Research and Virtual Research shared the same optical implementation: lenses from LEEP Systems. These wide angle optics (designed by Eric Howlett of LEEP), coupled with 2″ or 3″ LCD screens really did deliver a totally immersive visual experience…except that the resolution of the LCDs were so low that under this extreme magnification each pixel looked like a football; you were swimming is a sea of colored footballs!

LCD Screens and LEEP Optics
By the mid 90′s (and up to the present) a primary design criteria for head mounted displays was small size and light weight. Indeed there are entire head mounts that weigh only a few ounces and look almost like sunglasses. Sadly, immersion and wide field of view were abandoned. The new generation of head mounts had 20 – 30 deg. field of view. You felt like you were looking through a distant window.
For reasons which I will cover in a forthcoming post, wide field of view and small/light head mounted displays are mutually exclusive. Anatomy and physics bars the way.
Almost 20 years ago I demoed an early Virtual Research Flight Helmet complete with LEEP optics. Being very impressed but unwilling to drop six grand into my first head mount, I set about building my own. The Radio Shack LCD TVs that I found were very similar to the Sony TVs in the Flight Helmet and I set about installing everything in a Friday The 13th style hockey mask. The optics were my biggest challenge, but the answer was buried in Eric Howlett’s LEEP patent, not as a claim, but as a demonstration of how to achieve wide FOV with conventional optics.
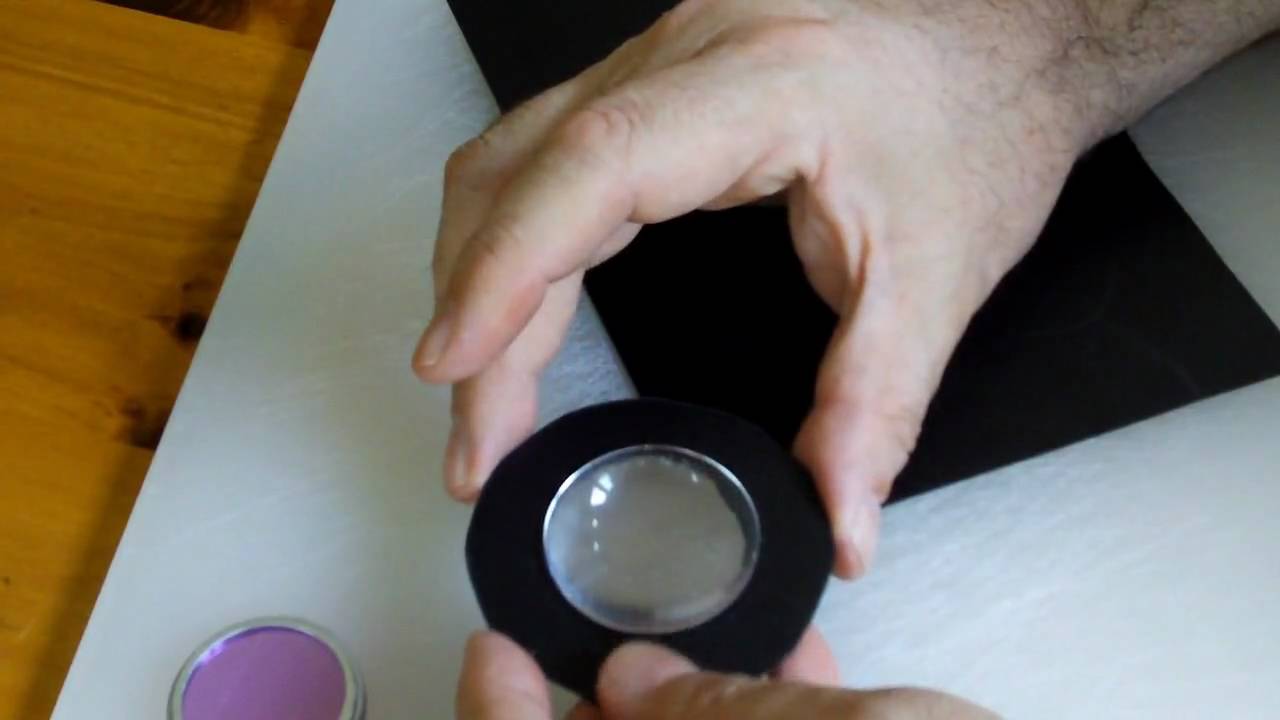
So… here’s a brief video recreating that optical design from 1991. I’ve cheated a bit by using my Android phone as the LCD screen, but otherwise the optical path is essentially the same. Aside from the phone, there’s about $25 in parts for a single eyepiece and it can display almost 90 deg. (diag.) field of view. The lens mounting is extra cheesy, but it demonstrates the optics quite well, and only takes 5 min. to assemble. So without further ado…
In the video I mention that someone needs to write an Android application to make it into a fully tracked head mount. After editing the video I remembered and tried out a couple of popular Android apps: Google Sky and Layar, both of which use the position sensors for a full 3D view. They work great with this lens system!
Parts List:
- Anchor Optics Plano Convex Lens AX73280 42.5mm dia. x 77.0mm FL – $7.00 (Eyepiece)
- Anchor Optics Double Convex Lens AX73424 62.8mm dia. x 72.4mm FL – $13,50 (Objective)
- 2″ PVC Coupler
- Small Sheet of Polystyrene plastic – 0.030 Black Sheet
If you were building this for real, you’d spray paint all the plastic parts to a black matte finish. LEEP also beveled the edges of the eyepiece lenses to make a better fit with the nose. To reduce weight, switch from glass lenses to CR39 plastic lenses.
If you assemble 2 of these with LCDs, you may find that the eyepieces are too far apart to match your eye spacing. Simply turn the two optical assemblies so that the LCDs point slightly outward and the eyepieces come closer together. Then apply 3M Press-On Fresnel Prisms.
Related posts:
8 Comments on “LEEP On The Cheap”
You can track this conversation through its atom feed.
Leave a Reply
You must be logged in to post a comment.
Hey Tone!
Nice article, about the 3m press on’s, do you put those over the small lens that go up against your eyes? Now what will these do? What would the sizes be for using a 4.8 lcd, how can I get the figures for the size I would need.
Thanks Tony and Im glad your still working with vr and taking the time schooling us these projects..
VR
Posted on March 23, 2011 at 8:06 pm.
Press on prisms are applied on the small lens on the surface closest to your eye. Just breath a little moisture on the flat side of the press on and it will stick tightly to the lens. The ridged side faces your eyes. The ridges are prisms and will bend the image around the axis of the ridges. It will be obvious which way the prism bends…you might have to turn the press on 180 deg if you see that the images in your displays are being pushed further apart.
How to figure out the right prism power. Prisms are measured in diopters. One diopters shifts the image 1/100 of the distance from the prism to the display screen. For example, if your display is 20 cm from the press on and you want to shift the image horizontally by 1 cm, you would need a 5 diopter prism.
Look at the geometry of your system. The centers of the two lenses should be approx. 65 mm apart, the average distance between a pair of human eyes. Ideally, the centers of the two displays should also be 65 mm apart, but with a 4.3 in. display, this is impossible. Measure the distance between display centers and subtract 65 mm and then divide that by 2 (because we want to shift each display inward by 1/2 the total amount need to arrive at 65 mm. Now you know the distance from prism to display and you know the desired horizontal shift. You can calculate the proper diopter for the press on.
A couple of hints…
Try turning the displays slightly so that they form a “V”, i.e. The displays face the bent axis that the prisms produce. This will prevent keystoning.
If your prisms are a bit too strong, turn them so the ridges are a bit diagonal, rather than vertical. This will reduce the horizontal shift, at the expense of adding some vertical shift ( you can compensate by moving the displays vertically). The Virtual Research Flight Helmet used this diagonal orientation.
Hope this makes some sense.
Tone
Posted on March 23, 2011 at 10:15 pm.
Tone,
I asked the question wrong, I wanted to know how I can figure out the sizes of the lens needed to use with a 4.8 lcd screen! Your setup is for a 2 inch screen right?
The mm dia and the mm FL is what I’d like to understand.
Should I make the plano convex dia bigger and keep the FL the same and same for the double convex? I saw that page has some mm dia 60 and above!
What made you choose those lens for your demo?
Thanks again.
Posted on March 30, 2011 at 10:40 pm.
There wasn’t any magic in selecting the lenses for this demo. I “borrowed” the specifications from Eric Howlett’s original LEEP related patent #4,406,532 (look it up on Google Patents), page 11 in the description of Fig. 5.
For a larger 4.8″ display, you can get away with a single lens element (per eye.) I’d suggest somewhere between 75mm and 100mm focal length plano convex. You want the plano side facing your eye (so you can apply the press-on.) The distance of the lens from the display surface will be about the same as the focal length. The diameter of the lens depends on how close you’re prepared to bring the plano side of the lens to your eye. Most users will be comfortable with the lens 20-30mm in front of their eyeballs, perhaps a bit more if they want to wear their eyeglasses at the same time. You can see the geometry of this issue in the recent post: Why Big Helmets Still Rule. I’d suggest a lens 30-40mm in diameter. At 40mm, you’ll want to grind flat a section of the lens edge, so that it doesn’t cut into your nose. At 30mm, you may get some vignetting (cropping of the screen edges) unless the lens is quite close to the eye and/or at the longer end of the focal length range suggested.
So… 75mm (or less) will give you wider field of view, but at some point a single lens system will not be able to hold focus on both the center of the display and the edges. At 100mm you’ll have a smaller FOV, although it will still be quite wide in comparison to modern HMDs, and you’ll have less vignetting to worry about.
With this size screen and lens focal lengths, you can get away with a mirror folded system, where the displays are mounted to the left and right of your head, facing each other, and there’s a 45 deg. mirror in front of each eye which bounces the line of sight towards the monitor, just like the original Virtuality 1000CS HMD, which also uses just a single lens element. This arrangement avoids the need for a Press-On prism.
The lenses are cheap enough to grab a few different FLs and diameters… see what Anchor Optics has in PCX. Possibilities include: AX76098, AX77567, AX20706, AX77592, AX20961, or AX73280.
Posted on April 3, 2011 at 4:27 pm.
Hey Tone!
Been awhile since I’ve asked some questions on this topic, Im glad there are some trying to put together an HMD. I still have some parts laying around just asking to be put together so if you don’t mind, I’d like to grab some ideas from your archives.
Now the last leep HMD they did was a single LCD correct? Now when I want to figure out how far my screen will be from the lens, this is where the focal point has to be the same correct? IF the screen is 3 inches away does the focal distance have to be 3inches for the lens as well? Maybe this is where I confuse myself on choosing what I need.
Now I saw that Palmertech has used that 5inch lcd that we tried to put in the MRG2. Would you consider 2 screens or one for better results?
Did you see the person who used a 7.2inch screen with 2 aspheric lens, I was woundering what the distance would have to be inorder to see the screen decent enough. I have a 8.4inch but I think its way to large to even try something like this setup. I did see using mirros and having the scrrens on the side like the cs1000 and another person did a project as well but I’d like to try and get away with one screen for now.
Thanks tone and good talking to you again.
Mike
Posted on January 31, 2012 at 6:47 pm.
Tone! After reading your posts alot and watching ur video I got to understand more of whats going on and what is needed. Thanks alot!! Hobbies are $$$, fun and full of headaches…..
Posted on February 3, 2012 at 7:46 pm.
This is my setup, Im using a pico pj, I have it sideways using the mirror setup 45 deg, giving about 3.5×2 inch screen and the back of the pj is 6 inches from the screen, the pj is at its max for sharpness anything closer and its blurry, unless I try a convex to shorten the throw distance.
Im gonna try and get a Condenser lens and use the 2 inch size diameter with about 2 inch focal length, does this sound about right, close enough to buy and test? OR should the FL be further out?
Posted on February 3, 2012 at 7:52 pm.
Ku,
Glad to see you’re very much still in the game. The short answer about eyepiece lenses is that the lens focal length will be approximately equal to the distance from the lens to the screen (including any mirror bounce distance.) The longer answer is that a single lens will produce quite a bit of distortion and chromatic aberration, whereas a multi-lens design would be tailored to minimize these (and are way beyond my ability to calculate.)
Regardless of the screen size, you’d use a focal length that’s roughly equivalent to the screen distance, but obviously putting a large screen close to the lens is going to require a very short focal length AND a large diameter lens (to support the ultra wide field of view.) Such lenses are problematic to manufacture (and thus to buy), as they’re quite thick. Another issue is that the distance from the lens to a large screen, up close, varies because the distance from the center of the lens to the center of the screen is much smaller than the distance of the lens to the far edges of the screen. If a=distance_to_screen_center, and b=screen_width, then the distance from the lens to screen edge is sqrt(sqr(a) + sqr(b/2)). So… if the center of the screen is in focus, then the edges of the screen may not be in focus.
Two lenses with a single LCD will likely require prisms…otherwise you’ll be asking your eyes to turn inward at a painful angle. Try holding your finger two inches in front of your face and force your eyes to converge on that finger. Now, hold that pose for 5 min. Hurts…right? I’ve explained the prisms in the post and earlier comments.
Anyway, send us some photos of what you wind up building. Sounds like you’re having fun!
Posted on February 3, 2012 at 8:16 pm.